 |
 Safety Emporium is a proud sponsor of this site. |
 |
Home Page --> Tutorial Lesson 9, Annealing
|
| Tutorial Lesson 9, Annealing | |
|---|---|
| Lesson 8 (Fire Polishing) |
Lesson 10 (Making a Test Tube) |
Annealing
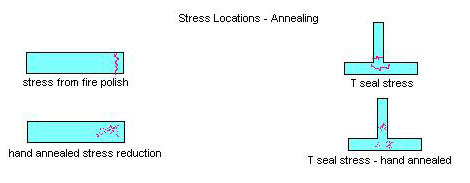
Whenever glass has been altered or shaped by exposure to a torch flame, you can be sure that stresses have been introduced. We can reduce some of these stresses by hand annealing. Glass apparatus should never be put into laboratory service unless it has been properly annealed!
Stresses are not visible to the naked eye, so glassblowers use a device called a polariscope to visualize the strains/stresses. If you have access to a polariscope, check out your seals before and after annealing. The more complicated the seal, the more likely there will be stresses harmful to the final product and its users. If you don't have a polariscope, you'll need to use a little imagination in performing this step.
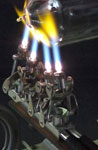
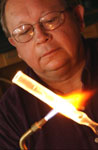
Use a soft, bushy annealing flame to "brush" away the stress areas located in and around the area of your fire polish and other seals that you make. Think of your flame as an artists paint brush. The strain (paint) needs to blend into the surrounding glass smoothly, with no jagged edges. The process should take approximately two minutes for the simple and small glass pieces you are working with. The annealing flame will often leave a sooty residue which can be wiped away with a soft cloth once the glass has cooled:
The Corning Museum of Glass has a web page with an excellent video that demonstrates stress in unannealed and properly annealed objects.
| Tutorial Lesson 9, Annealing | |
|---|---|
| Lesson 8 (Fire Polishing) |
Lesson 10 (Making a Test Tube) |